
There is no secret formula. The “secrets” are habits that are boring, slow and invisible once the floor is done: measure moisture instead of guessing, never skip a sanding grit, make the color sample on your own wood, leave room for the wood to move, and give the finish time to cure. This page boils each one down to a card: the short version, why it matters, the hardest part, and what to ask any contractor.
The one-minute version
- Measure, do not guess. Moisture in the wood and the subfloor decides whether a floor stays flat.
- Old houses hide things. In a home built before 1978, test for lead paint before sanding painted wood. Suspect old tile or glue? Stop and test for asbestos.
- Flat first. A floor can only be as flat and quiet as what is under it.
- Leave room. Wood swells and shrinks. A gap at the walls is not a flaw.
- Do not skip grits. Each sanding step has to erase the scratches of the last one.
- Edges are the hardest sanding. The edger leaves swirls, and they sit exactly where your eye lands.
- Color comes from the wood, the last grit and the sample. The same stain looks different on red oak and white oak.
- Dry is not cured. A finish can feel dry in hours and still be soft for days.
- Dust control is only as good as its seals. Loose hoses make “dustless” a claim, not a result.
- Ask for it in writing. Scope, products, color and moisture readings.
Before any work starts
Moisture reading
Short version. Meter the wood and what it sits on. Do it before installing, and before sanding a floor that ever got wet.
The details and numbers
One trade magazine’s rule for nail-down floors: the wood should be within 4 percentage points of the wood subfloor for strips under 3 inches wide, and within 2 points for wider planks. It also says to take about 20 readings per 1,000 square feet, then average and record them. Over a concrete slab, installers use a probe test inside the slab (ASTM F2170). A common pass line is below 75 percent relative humidity, unless the flooring maker says otherwise.
Hardest part. You cannot see moisture. A reading that passes today promises nothing about next winter. That is why one installer in California builds in extra room for expansion even when readings pass.
Ask: “Will you take moisture readings and show me the numbers?”
Acclimation
Short version. Letting wood “sit” has no magic number of days. It is ready when it has settled to the moisture level of the house.
The details and numbers
A flooring-trade writer puts it this way: acclimation is judged with a moisture meter, not with a calendar. Another trade article suggests the house should be at normal living conditions, 60 to 80°F and 30 to 50 percent humidity, for at least five days before an engineered floor goes over concrete. Some manufacturers still give a fixed time, such as 72 hours for one brand, so the maker’s sheet governs.
Hardest part. Patience and paperwork. Boxes stacked in a garage do not count.
Ask: “How do you decide the wood is ready to install?”
Lead and asbestos
Short version. You cannot see either one. If the house is old, the safe move is to stop and test before sanding.
The details and numbers
The EPA’s lead rule (called RRP) requires certification for anyone paid to disturb painted surfaces in homes built before 1978, and it covers every firm, including one-person shops. Older floor tile, sheet-flooring backing and the glue under them may contain asbestos, and sanding them can release fibers, so sampling is for professionals.
Hardest part. The cost of testing feels like a delay. It is cheap compared with contaminating a house.
Ask: “My house was built in [year]. What do you do about lead and old tile or glue?”
Sources: 8, 9. See also our hiring guide.
What is under the carpet
Short version. Nobody knows until the carpet and pad come up.
The details and numbers
Hardwood sometimes hides under old carpet, along with staples, tack strips and glue to scrape off. Pet urine can soak through carpet and pad into the subfloor, and one repair writer’s blunt advice was to pull the stained subfloor and replace it. A trade writer on old floors says to look for discolored or warped boards and point out each questionable area to the owner.
Hardest part. The scope can change on day one. A fair contractor tells you what they found and shows you.
Ask: “If you find damage under the carpet, how do I hear about it, and who decides?”
The part nobody photographs: the subfloor
Flat and quiet
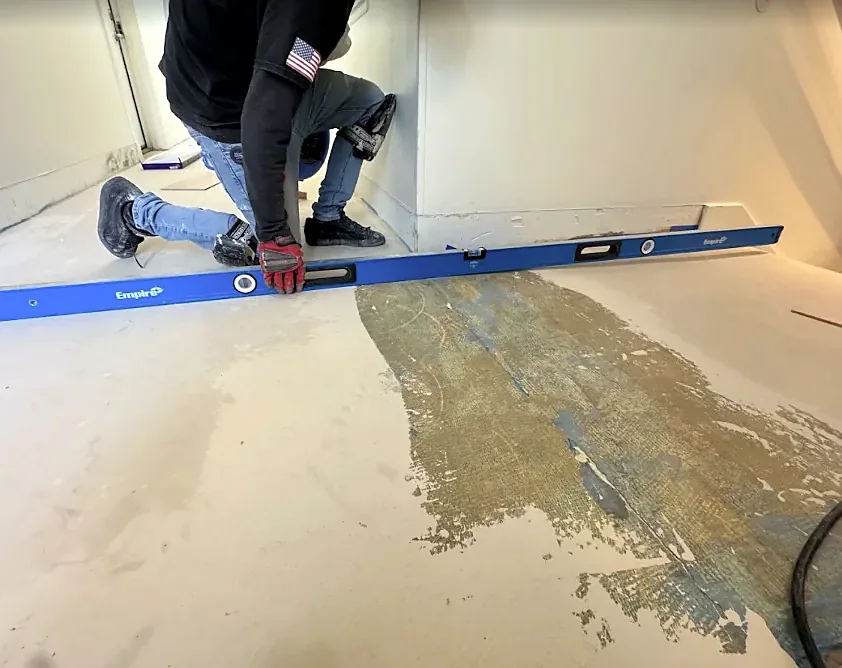
Short version. New wood copies the floor under it. Fix high spots, low spots and squeaks first.
The details and numbers
An APA handout citing the National Wood Flooring Association gives the flatness limit for nailed wood floors as 3/16 inch in 6 feet or 1/4 inch in 10 feet. It also recommends ring-shank or screw-shank nails in the subfloor to cut noise and nail pops. A common squeak fix from below is a thin, glue-coated shim tapped between joist and subfloor. From above, the usual trick is a pilot hole and a screw.
Hardest part. It is the least glamorous work on the job, and it is far cheaper before the floor is down than after.
Ask: “How do you check and fix the subfloor before installing?”
Crawlspaces and slabs
Short version. The moisture you cannot see is underneath.
The details and numbers
APA calls for a vapor retarder in crawlspace foundations, and a trade magazine says a Class I vapor retarder goes on a slab beneath a wood subfloor. Over an unconditioned crawlspace, one trade guide advises recording temperature, humidity and moisture both below and above the subfloor so the difference is not too large.
Hardest part. Barriers and readings only help if someone checks them.
Ask: “What is under my floor, and how will you protect the new wood from it?”
Laying the floor
Expansion room
Short version. Wood moves with the seasons. A hidden gap at the walls keeps it from buckling.
The details and numbers
One manufacturer’s installation sheet calls for a gap of about 1/2 to 3/4 inch between the planks and the walls. With no room to expand, boards can buckle. Baseboards, shoe molding and door thresholds cover the gap. In Santa Barbara, one installer quoted by a moisture-meter maker says the air runs around 70 percent relative humidity and that he builds in extra expansion, for example a small strip of expanding material every three or four rows.
Hardest part. Leaving a gap the owner will never see is a trust call. A floor laid too tight shows up months later as lifted boards.
Ask: “How much room do you leave at the walls, and what covers it?”
Layout, mixing and joints
Short version. The first line decides the whole room. Mixing boards from several boxes keeps the floor from looking striped.
The details and numbers
Guides for nail-down floors say to lay boards parallel to the longest wall and across the joists, to plan the last row’s width ahead of time (it usually needs cutting), and to mix boards from several boxes. End joints are staggered. Sources differ on the minimum, from 6 to 8 inches, so a good contractor follows the maker’s sheet. This Old House warns that cutting every patch board to the same length makes a repair look like a trapdoor.
Hardest part. Balancing color, length and joint spacing at once, board after board.
Ask: “Do you mix boards from several boxes, and how do you plan the last row?”
Herringbone and chevron
Short version. These patterns forgive nothing. A small drift at the start becomes a big error across the room.
The details and numbers
Wood Floor Business calls herringbone an unforgiving pattern and says a slight veer can grow quickly. The method it describes starts from a line down the center of the room, checks that the plywood backer is square, and keeps rechecking the distance from the corners to the next line while nailing. This Old House says the same: veering off by a fraction of an inch sends the whole pattern off.
Hardest part. Straightness is checked constantly, not once. We found no published numeric tolerance.
Ask: “Where do you start the pattern, and how do you keep it straight?”
Stairs
Short version. Every step is a little different, and the glue matters more than the nails.
The details and numbers
A Wood Floor Business guide to stair treads says the adhesive is much more important than the fasteners. It also says the tops of the stringers will never be level, so you work from the front edge of the riser, and that stairs call for a trained carpenter. Specialty tools can template each tread and riser.
Hardest part. No cut repeats. Each tread is measured and fit on its own.
Ask: “How do you fit and fasten each tread?”
Sources: 20
Doorways and transitions
Short version. Good work tucks the floor under the door casing instead of cutting around it.
The details and numbers
Undercutting means trimming the casing so the new board slides underneath. The cut is made with a flush-cut saw or oscillating tool, scored first, with a scrap of the flooring as a height guide. A reducer joins two floors of different heights with a gentle slope so no one trips.
Hardest part. A clean cut at exactly the right height, repeated at every doorway.
Ask: “Do you undercut the casings or scribe around them?”
Sanding: never skip more than one grit
Grit steps
Short version. Never skip more than one grit. Each pass erases the last one’s scratches.
The details and numbers
Wood Floor Business and Hardwood Floors Magazine both say not to skip more than one grit in the sequence, because skipped scratches show up in the final result. One typical path runs from 36 to 60 to 80 and then to 100 or 120. Sanding too fine can also hurt: it can burnish the wood so stain or finish does not stick.
Hardest part. Discipline. Rushing a rough grit costs more time later than it saves.
Ask: “What grits will you run, and what is your last one?”
Edges and corners
Short version. The edger is the hardest tool to use well. Its swirls sit by the walls, right where you look.
The details and numbers
Trade writers say an edger can do more damage than almost any other machine, and that it is supposed to leave circular marks, so the job is to blend them. Pros work with the grain and hand-sand the ends to bridge the difference between the edger’s scratches and the big drum’s. Dirt left on the floor between cuts can create swirl marks, so cleaning between grits matters.
Hardest part. The tool leaves swirls by design. The skill is in hiding them.
Ask: “How do you blend the edges into the middle of the floor?”
Waves, chatter and ridges
Short version. Machine marks often do not show until the finish goes on.
The details and numbers
Wood Floor Business lists the causes: a drum that is out of balance or out of round, hard spots, badly installed paper, compressed rubber, even bad electrical supply. Cutting the first pass at a slight angle, about 7 to 15 degrees, helps prevent waves and flatten the floor. Another trade piece admits that every wood floor will show some sanding marks. The goal is marks too small to see standing up.
Hardest part. Well-kept machines, steady pace, and honesty that “perfect” is a standard, not a fact.
Ask: “How do you check the floor for sanding marks before finishing?”
How many times can a floor be sanded
Short version. Often six to eight times for solid wood, but it depends. Under 3/32 inch of wear layer, do not sand.
The details and numbers
Hardwood Floors Magazine says most solid floors can be sanded six to eight times in their life, and a typical sanding removes 1/32 to 1/16 inch. Engineered floors have wear layers from 1/16 to 1/4 inch. If the wear layer is under 3/32 inch, sanding is not recommended. The same trade writer says the count depends on the thickness, the equipment and the skill of the person sanding.
Hardest part. The wear layer cannot be seen from the top. A feeler gauge slipped into a gap between boards can measure down to the tongue, which works better on solid floors than engineered.
Ask: “How do you know how much wood I have left to sand?”
Sources: 30, 31. See also can my floor be refinished.
Color: why the sample matters
The sample is the contract
Short version. Make the color sample on your wood, sanded the way the floor will be, and sign off on it.
The details and numbers
Trade sources say the last grit changes the color: a finer final sanding gives a lighter stain, so a floor sanded finer than the sample will not match it. They also say to wipe sample colors on the actual floor after the second sanding, or to make a panel about 2 by 3 feet, sanded the way the floor will be, and to have the customer approve it. One caution: a very pigmented stain can be hard to sand out of a sample made on the floor, so a panel may be safer. Species and light also change color over time (cherry darkens, walnut lightens), and a chip of a different species will not match.
Hardest part. Setting expectations before stain touches the floor.
Ask: “Will you make a sample on my wood and keep it for reference?”
Red oak vs white oak, and mixed woods
Short version. Same stain, different floor.
The details and numbers
One retailer notes that dark walnut on red oak and on white oak looks like two different floors: red oak is warmer with an open grain, white oak is cooler and tighter. Mixed woods are common in older houses. One of La Cumbre’s Yelp reviews describes exactly that: There was an issue with my wood-some was white oak; some red oak. Tony was able to add a tint and make it all blend.
Georgene V., on our home page.
Hardest part. Blending two woods that take color differently. We found no trade source that lays out a general method beyond making samples on the actual species.
Ask: “My floor has more than one wood. How will you make it blend?”
Sources: 36
Blotching, water-popping and tannin
Short version. Some woods take stain unevenly, and water, dust and finish can all change the color.
The details and numbers
Maple, birch, cherry, pine and alder are the species most likely to blotch. A maple specialist says even small sanding flaws that would not show under clear finish show up under stain. Water-popping wets the wood to open the grain and deepen color. But uneven water can leave blotches whose only fix is to resand, and staining before the wood is dry can also leave the color blotchy. On white oak under water-based finish, fine sanding dust and water can pull out tannins, which is why one trade writer stresses removing all the dust and applying a very thin first layer of finish.
Hardest part. The failures show up late, after the stain or finish is on.
Ask: “What species is my floor, and what risks come with the color I want?”
Finish: the last coat is the one you live with
Applying it
Short version. Keep a wet edge, do not overwork it, and keep the room at the right temperature.
The details and numbers
A Wood Floor Business how-to says to cut in along the starting wall and a few feet along the adjoining walls, with room and floor at about 65 to 70°F. Working the applicator back and forth too much can cause bubbles, and stop marks come from the flattening agents in the finish where the applicator reverses or lifts. Bona’s data sheet for one waterborne finish lists 65 to 80°F and 40 to 60 percent humidity, and says high humidity or low temperature slows drying. It also says not to spread too thin: 350 to 400 square feet per gallon.
Hardest part. Speed and consistency across a whole room before the edge dries.
Ask: “How many coats, and which product?”
Dry is not cured
Short version. The floor can feel dry in hours and still scuff for days. Follow the product’s sheet.
The details and numbers
For that Bona waterborne finish: dry in 2 to 3 hours, walkable after 24 hours but easy to scuff, about 80 percent cured after one day and fully cured after three. For another Bona-brand finish, full hardness takes seven days. Bona’s customer advice is stocking feet in 3 to 4 hours, furniture back in 48 hours, and area rugs after about a week once fully cured. Oil-based finishes take longer. Some sources say several days for furniture and weeks for rugs.
Hardest part. Waiting. Rushing the move-in is a common way to ruin a good finish.
Ask: “When can I walk on it, put furniture back, and lay rugs?”
Screen and recoat
Short version. A new coat only sticks to a clean, lightly abraded floor. Wax and silicone ruin it.
The details and numbers
Hardwood Floors Magazine says a new finish bonds by mechanical or chemical adhesion, so the old finish must be lightly abraded to the maker’s recommendation. It also describes tests: a rag that picks up yellow or brown color may mean wax, and so may white spots about 10 minutes after a drop of water. Contamination can make finish crawl into craters called fish-eyes.
Hardest part. Contamination is invisible until the finish fails. We found no floor-specific trade test for silicone.
Ask: “How do you test whether my floor can be recoated?”
Sources: 47, 48. See also screen and recoat.
Dust
Short version. Dust control is a system. It works only if every seal and hose does.
The details and numbers
Hardwood Floors Magazine says dust must not get back into the air anywhere between the sander and the dustbin, and that HEPA certification matters for older buildings. Wood Floor Business reports systems that claim to capture up to 99.8 percent of dust, but says many “dustless” claims fall flat because of loose hoses, poorly sealed shrouds or hasty work. That figure is the makers’ claim, not a test we could verify.
Hardest part. Sealing every doorway, vent and joint, and keeping it sealed.
Ask: “What exactly do you seal off and which vacuum do you use?”
Repairs: making a patch disappear
Lacing in new boards
Short version. Cut out the damage without hurting the neighboring boards, then weave new boards into the old rows.
The details and numbers
This Old House says to cut around the damaged boards carefully with an oscillating tool and to match species, grain and color. A Wood Floor Business story describes one shop tearing back existing rows, mixing old and new boards and sanding them together, after which the repair was undetectable. Old stock can be tighter-grained than anything sold now.
Hardest part. Matching aged wood and not damaging the boards next to the patch.
Ask: “How will you match the old boards, and how far will you tear back?”
Sources: 17, 51. See also replacing boards.
Cupped or wet floors
Short version. Do not sand a floor that is still drying. It can end up crowned.
The details and numbers
Cupping happens when the bottom of a board holds more moisture than the top. Sanding a cupped floor too soon can leave the boards crowned once they dry. One trade rule of thumb: sand a non-flat floor only when top and bottom moisture are within 1 percent. Another trade piece says a floor can feel dry on top and still hold moisture below, and that readings should be written down and shared with the homeowner. We found no published number for how long to wait. It depends on the readings.
Hardest part. Patience. A floor that looks ready may still be wet inside.
Ask: “How will you know my floor is dry enough to sand?”
Sources: 52, 53, 54. See also water damage.
The hardest parts of the job, side by side
This table is our summary of the cards above. The ranking of “hardest” is our judgment from the sources, not a published list.
| Part of the job | Why it is hard | What it looks like when done right |
|---|---|---|
| Moisture and timing | You cannot see it, and conditions change by season. | Readings taken, written down and shared before work. |
| Edges and corners | The edger leaves swirls where eyes land. | Swirls blended with the grain, no change at the wall line. |
| Color matching | Species, last grit and old patina all change the result. | A signed sample made on your wood. |
| Herringbone and stairs | Errors compound and no two steps are alike. | Straight lines, tight joints, glued and fastened treads. |
| Invisible repairs | Old and new boards age differently. | A patch you cannot find. |
| Dust control | It fails at the weakest seal. | Sealed rooms and a closed system. |
| Finish and cure | Timing, temperature and patience. | Even film, no bubbles, a long wait before rugs. |
What a transparent contractor shows you
- A written contract with the license number and a description of the work, including brand names and colors (California requires this for home improvement contracts).
- A deposit within the California limit: $1,000 or 10 percent of the price, whichever is less.
- Written moisture readings, where moisture matters.
- A color sample, made on your wood, that you approved.
- The names of the products and the number of coats.
- Cure times for walking, furniture and rugs.
- Photos of progress. This one is our suggestion, not an industry rule.
The first two come from the California contractors board (CSLB) (source 55). See the hiring guide for the full contract rules.
How Tony’s crew does it
This page describes the trade. Here is what Tony has told us about his own jobs.
- Moisture. “We test both the wood and the subfloor using calibrated pin and pinless moisture meters, and we perform ASTM moisture tests before any installation.”
- Color. Red oak and white oak are balanced with custom staining, bleaching and color matching. See color matching.
- Finish. Bona most often, then DuraSeal, Pallmann, Berger-Seidle, Ciranova, Loba, Rubio Monocoat and WOCA. See finishes.
- Cure. Furniture goes back three days after the last coat, rugs after 30.
“The hardest part is when there’s a gap between a client’s vision and the final result. That’s why we focus heavily on clear communication and physical samples early on, to ensure we exceed their expectations every time.”Tony
This page describes how the trade works. To hear how Tony would handle your floor, call (805) 698-9745. Estimates are free.
Sources
- Hardwood Floors Magazine, subfloor focus: minimizing moisture, 2017
- Hardwood Floors Magazine, installers need to measure moisture content of wood subflooring, 2017
- Wagner Meters, how to test moisture in concrete floors
- Wagner Meters, challenges for California wood flooring installers
- Hardwood Floors Magazine, misconceptions about acclimation, 2023
- Hardwood Floors Magazine, engineered flooring installation on concrete, part 2
- Wickham Hardwood, installation instructions, 2021
- US EPA, Renovation, Repair and Painting Program
- NC DHHS copy of EPA/CPSC, Asbestos in Your Home
- This Old House, how to remove carpet
- Journal of Light Construction, treat or replace pet-stained subfloor
- Wood Floor Business, resanding and refinishing historic wood floors
- APA, Quality Floors from Start to Finish (handout)
- This Old House, fixing squeaky floors
- LL Flooring, how to install nail-down hardwood flooring
- LL Flooring, floor moldings and transitions
- This Old House, how to patch hardwood
- Wood Floor Business, how to install herringbone wood flooring
- This Old House, how to install a herringbone floor
- Wood Floor Business, stair treads dos and don’ts
- Hardwood Floors Magazine, undercut and prep a floor casing, 2024
- Wood Floor Business, know your grit sequence
- Hardwood Floors Magazine, grit sequence and the effects on today’s finishes, 2025
- Ardec, choosing the initial grit (a flooring supplier)
- Wood Floor Business, using an edger to flatten and blend a wood floor
- Hardwood Floors Magazine, refining the swirls, 2021
- Hardwood Floors Magazine, eliminate edger marks, 2019
- Wood Floor Business, fixing and preventing chatter and wave
- Hardwood Floors Magazine, sanding aesthetics: causes and cures, 2019
- Hardwood Floors Magazine, how many times can a wood floor be sanded, 2025
- Hardwood Floors Magazine, can a floor withstand a resand, 2019
- Wood Floor Business, staining strategies
- Hardwood Floors Magazine, great expectations: making samples, 2020
- Wood Floor Business, don’t go astray with custom stain colors
- Wood Floor Business, domestic species for wood flooring 101
- Panel Town, using stain sample decks (a retailer)
- Fine Woodworking, avoid color mistakes and fix a blotchy stain, 2008
- Wood Floor Business, my process to successfully stain maple flooring
- Wagner Meters, the pros and cons of water popping
- Wood Floor Business, why tannin pull is a thing of the past for me
- Wood Floor Business, how to apply waterborne wood floor finish
- Wood Floor Business, poor applicator technique leaves streaks
- Bona Traffic HD technical data sheet (retailer-hosted copy)
- Bona Mega Varnish data sheet (retailer-hosted)
- Bona, what to expect when sanding and finishing hardwood floors
- Flooring Clarity, how long before furniture goes back (secondary source)
- Hardwood Floors Magazine, recoating a previously finished floor, 2017
- Popular Woodworking, fish-eye and silicone
- Hardwood Floors Magazine, 4 simple rules for containing sanding dust
- Wood Floor Business, trapping dust: what’s happening now and what’s next
- Wood Floor Business, blending in wood floor repairs, 2014
- Fine Homebuilding, 11 wood flooring problems and solutions
- Hardwood Floors Magazine, restoration work: the most important aspect, 2019
- Wood Floor Business, cupping: why it happens and what to do
- CSLB, nailing down home improvement contracts